This article deals with an error that will be seen if you try to change shift start or end times when the shift has future appointments associated with it. To simply change shift start and end times, please click here.
You may have been attempting to edit your shift or timeslot start and end times and encountered the following error:

This error occurs because, to protect the integrity of your appointments, the system will not allow you to change the start or end times of a shift or timeslot that has future appointments associated with it.
To fix this issue the best way is to:
- Create a temporary shift
- Move the appointment(s) to the temporary shift
- Edit the times of your existing shift as you like
- Move the appointment(s) back to the original shift
- Delete the temporary shift
1. Create a temporary shift
Select ‘scheduling’ from the main menu and click on the ‘weekly scheduling’ dropdown.
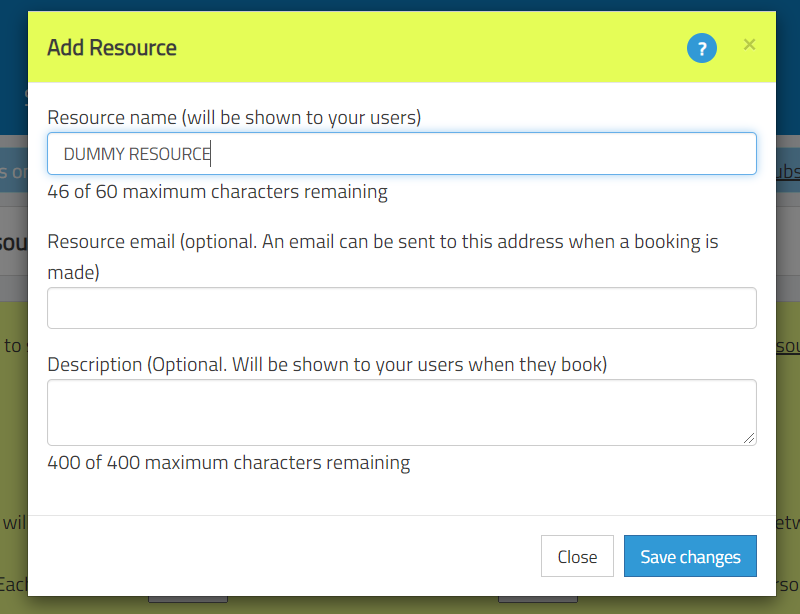
The easiest way to create a temporary shift is to create a dummy resource and then copy the shifts to the dummy resource. So create your dummy resource:

Next, go back to the shift causing the problem (you will need to select the red button top right ‘choose another resource’).
You can easily copy the shift causing problems to your dummy resource by clicking ‘COPY THESE SHIFTS TO ANOTHER RESOURCE’:
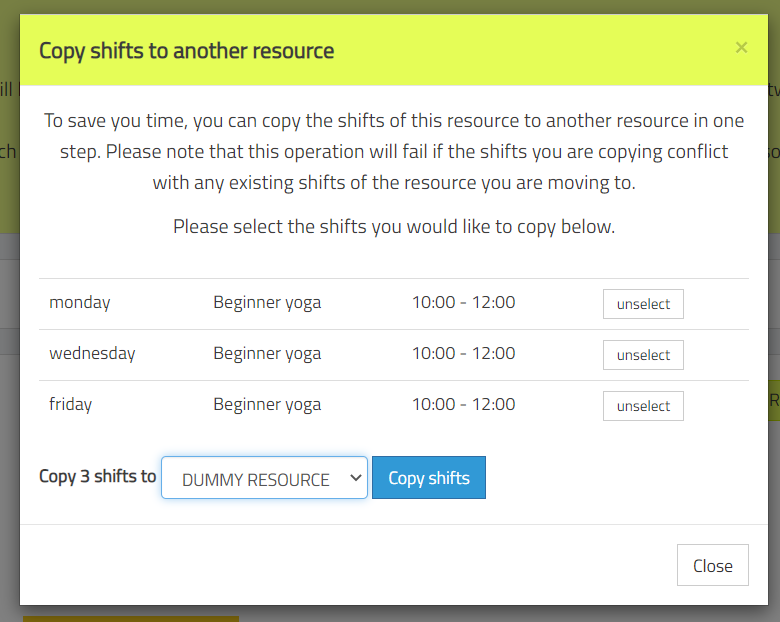
Click ‘copy shifts’ and you have created your new shifts.
2. Move the appointment(s) to the temporary shift
Select ‘appointments’ from the main menu and then ‘manage appointments’. You want to find the date and time of the timeslots with the appointments that you need to move.
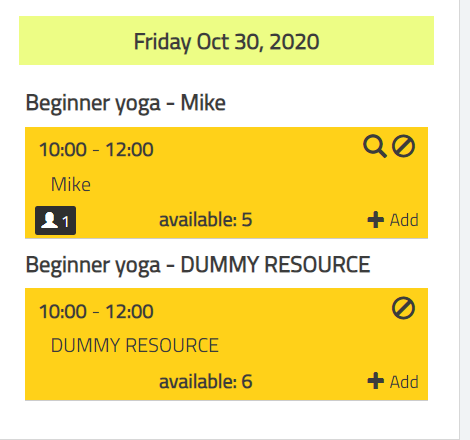
Click on the ‘person’ icon or the ‘magnifying glass’ icon to bring up the appointments list. You want to click on ‘move / delete’ for the appointments you need to move:
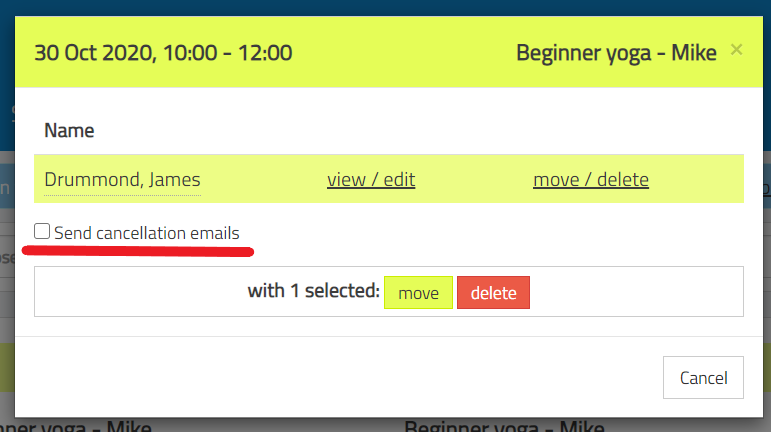
Please note: it’s important to unselect the ‘send cancellation emails’ checkbox so that emails are not sent concerning this move to your customers.
Click on ‘move’, this will close the dialogue. Simply hover over the new timeslot that you want to move the appointment to and click it. That will move the appointment(s) to the new shift.
3. Edit the times of your existing shift as you like
Select ‘scheduling’ from the main menu and click on the ‘weekly scheduling’ dropdown. Now, as your shift does not have any appointments associated with it, you can edit the times as you like.
4. Move the appointment(s) back to the original shift
Select ‘appointments’ from the main menu and click on the ‘manage appointments’ menu item. You simply want to reverse the process you performed in moving the appointments to the temporary shift.
5. Delete the temporary shift and resource
Select ‘scheduling’ from the main menu and click on the ‘weekly scheduling’ menu item. You want to select your dummy resource using the red button top right. Since this temporary shift no longer has any appointments you can delete it no problem.
Finally, you may want to delete the temporary resource you created as well. You can do that by selecting ‘settings’ from the main menu and clicking on the ‘resources and services’ icon.